
Five years ago I began hunting deer almost exclusively with 12-gauge shotgun slugs. Although centerfire rifles are legal arms where I live, the woods where I hunted were typically incredibly thick, limiting visibility to 50 yards or less. Any shot taken at a game animal in such an environment would likely be at very close range and would have to be taken fairly quickly. Not only is the fast-handling nature of a shotgun useful while hunting in thick brush, but the massive, game-dropping tissue trauma produced by a .690” to .725” diameter projectile at close range is hard to argue against.
Being an avid handloader, I soon began researching the options available for constructing my own custom slug loads at home. After a great deal of trial and error, I determined that I could easily manufacture my own slug loads without investing in more than an inexpensive shotshell reloading press, powder measuring equipment, and some components. I even found that some of my best slug loads incorporated the exact same type of fold crimp used to close a typical trap load and that there was no need to make use of specialized roll crimping tools.
What follows is a basic guide to assembling shotgun slug loads at home.
Tools and materials required
- Reputable load data
- Single stage shotshell reloading press
- Powder scale and trickler
- Slugs, powder, primers, hulls, gas seals, and wads as specified by load data
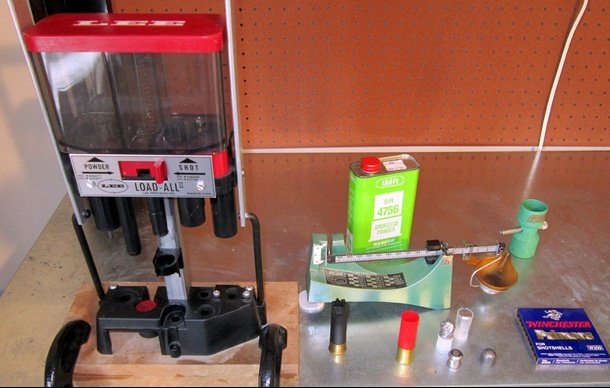
Above: The tools and materials needed to handload shotgun slugs.
Safety note: Unlike metallic cartridge handloading where a certain degree of substitution of components is acceptable, load data must be followed to the letter when handloading shotshells. Don’t assume, for instance, that if a load recipe calls for Winchester 209 primers and Remington STS hulls that you can simply substitute with CCI 209 primers and Winchester AA hulls. My research indicates that such seemingly minor substations can result in dangerous pressure spikes upon firing.
Slug loading variation 1: Home cast sabot slugs
Perhaps the most economical way to shoot a lot of slugs is to start from scratch and cast slugs from one of the molds manufactured by Lyman or Lee. These slugs are designed to use a standard trap wad as a carrier and to sit inside a common trap hull. While they are technically designed for use in rifled barrels, I have had exceptional results firing them through smooth bores. Most loads can be closed with a standard fold crimp.
Step 1: De-cap and resize the hulls
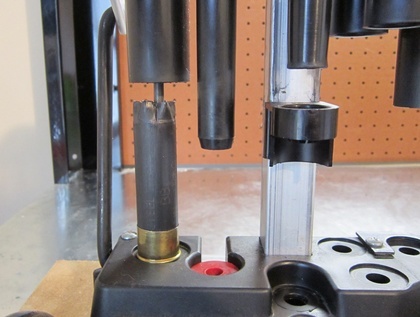
If using previously fired shotshell hulls, first inspect each one for defects or signs of excessive wear. Next, use a reloading press to de-cap and resize the hulls. Additionally, primer pockets should be cleaned and the mouth of the hull flared open to allow wads and slugs to by easily placed inside the hull. If factory new, primed hulls are being used, this step may be skipped.
Step 2: Prime the hull

Using the priming station of the reloading press, insert a primer into the hull. If factory new, primed hulls are being used, this step may be skipped.
Step 3: Charge the hull
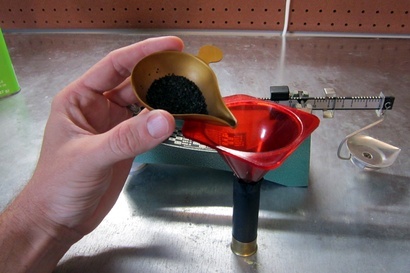
Using a powder scale and trickler (or a quality powder measure), dole out the appropriate amount of powder and charge the hull. Typically, the powder bushing integral to most shotshell reloading presses do not throw charges consistent enough for the production of accurate slug loads and should thus be avoided. Assembling a good slug load has more in common with assembling a rifle round than it does with making a trap load.
Step 4: Seat the wad
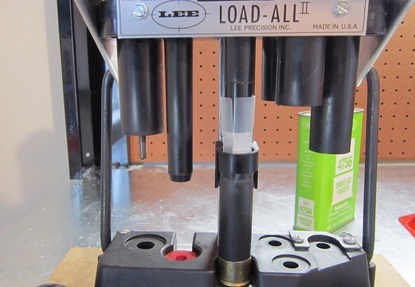
Using the appropriate station of the reloading press, seat the appropriate wad onto the powder.
Step 5: Insert the slug
Using finger pressure, firmly seat the slug into the wad.
Step 6: Apply crimp
Using the crimping station on the press, close the hull with a fold crimp.
The slug load is now complete.
Slug loading variation 2: Plumbata slugs
Plumbata slug is the technical term for any shotgun slug that incorporates a plastic spacer wad/gas seal section affixed to the base of the lead projectile. Factory loaded examples of plumbata slugs include numerous offerings from Brenekke such as the tried and true K.O. slug.
The handloader has access to plumbata slugs in the form of such slugs as the Dangerous Game Slug (DGS) which are manufactured by the Italian firm Gualandi and distributed in the United States by Ballistic Products Inc. of Minnesota.
Above:A Gualandi Dangerous Game Slug (DGS) next to a factory new Cheddite Multi-hull (left).
Loading these slugs is an incredibly simple process. Once the appropriate hull has been prepared, primed and charged in accordance with reputable load data, firmly seat the slug atop the powder and crimp closed with a fold or roll crimp (depending on which crimp type is specified by the load data).
Some recipes may call for additional gas seals or filler wads to be added prior to seating the slug, but numerous recipes exist that require only a charged hull, the one piece slug, and a basic fold crimp. Such loads can be very accurate.
Slug loading variation 3: Foster slugs
Foster slugs are hollow-based, lead slugs that are common in such inexpensive factory loads as the Remington Slugger. The design dates back to the 1930s and was a vast improvement over the round ball shotgun slug loads that were previously common among shotgun wielding big game hunters.
The do-it-yourselfer can manufacture his or her own Foster slug loads either by casting them from a mold made by Lyman, or by purchasing pre-made slugs from a retailer such as Ballistic Products. While most Foster slug loads call for a roll crimp, there are a number of Foster loads that can be closed with a fold crimp.
While the loading procedure for foster slugs is similar to that of the sabot slugs and plumbata slugs outlined above, Foster loads typically incorporate multiple wad components including plastic gas seals as well as fiber and cardboard spacer wads.

Above: A 1-ounce Lyman Foster slug atop its gas seal and spacer wads.
These wad components can be challenging to insert into a previously fired hull as the crimp at the hull’s mouth will partially re-close after firing. I have found that the hull mouth can be widened slightly by inserting a powder funnel and rotating the hull a dozen or turns. Care should be taken not to use too much force and damage the hull.
Accuracy
Saving money by handloading slugs is fine exercise but ultimately useless if the final product does not yield reasonably accurate groups. While I have created numerous failure loads over the last few years (slugs that yielded buckshot-like patterns at 50 yards) I have also created loads that were almost shockingly accurate.
Consider, for instance, the target below.
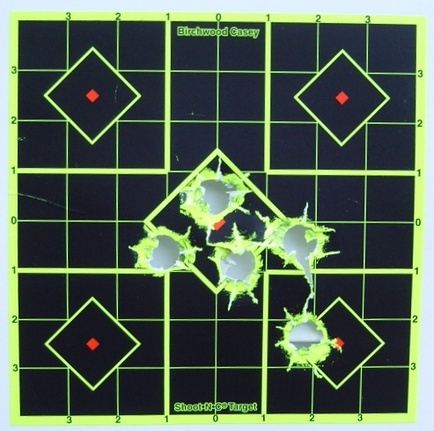
The five-shot, 50 yard group was yielded by handloaded DGS slugs fired though my Benelli Nova with ghost ring sights. While shotguns do tend to be a bit particular when it comes to what slugs they will shoot accurately, with a little bit of experimentation, the handloader can produce loads that will yield exceptional accuracy. (9766)


